Making your own candle wick can be a rewarding experience that allows you to customize your candle-making process. Whether you’re a beginner or an experienced candle maker, understanding the basics of candle wicks is essential to create a successful and long-lasting candle. In this step-by-step guide, we will explore the different types of candle wicks, gather the necessary materials, prepare for the wick-making process, and troubleshoot common issues that may arise.
Understanding the Basics of Candle Wicks
The role of the wick in a candle is crucial to its overall performance. A wick serves as a pathway for the melted wax to be drawn up to the flame, where it is vaporized and burned. Size, material, and construction all play a significant role in how a wick performs in a candle.
By following the step-by-step guide below, you can confidently learn how to make a candle wick and achieve a perfectly burning candle every time. Enjoy the process of customizing your candles and experimenting with different wick materials to create unique and beautiful results.
When selecting a candle wick, it’s essential to consider the diameter of the container or the width of the candle. A wick that is too small may not be able to draw up enough wax to fuel the flame, resulting in a weak burn. Conversely, a wick that is too large can cause the candle to burn too hot and fast, leading to excessive dripping and soot.
The Role of a Wick in a Candle
The primary function of a wick is to provide a steady and efficient burn for the candle. It must be able to carry the melted wax from the pool to the flame consistently. A well-chosen wick should create a stable flame that produces minimal smoke and soot.
Furthermore, the material of the wick can impact the way the candle burns. Cotton wicks are a popular choice due to their clean burn and minimal soot production. On the other hand, wooden wicks are known for their distinctive crackling sound, reminiscent of a cozy fireplace.
Different Types of Candle Wicks
There are various types of candle wicks available, each designed for specific candle types and sizes. Some common types include cotton wicks, braided wicks, and wooden wicks. Cotton wicks are versatile and widely used, while braided wicks provide a more controlled burn. Wooden wicks offer a unique crackling sound and aesthetic appeal.
When experimenting with different wick types, it’s essential to consider the wax blend used in the candle. Soy wax, for example, may perform differently with a certain wick compared to paraffin wax. Understanding the interaction between the wick and wax is key to achieving the desired burn characteristics for your candle.
Gathering Your Candle Wick Materials
Before you begin making your candle wick, gather the essential tools and materials. These items will ensure a smooth and successful wick-making process.
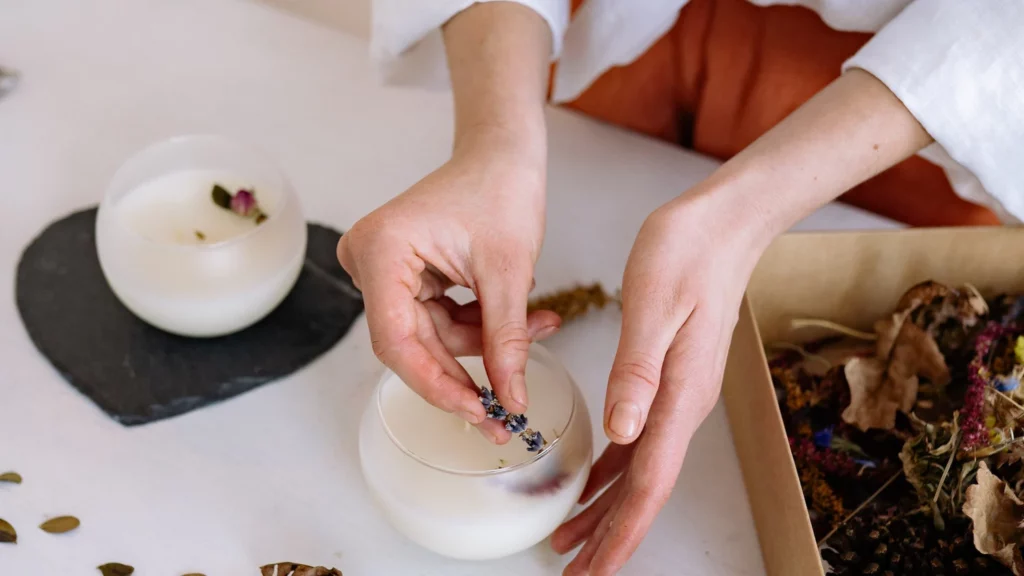
Creating your own candle wick can be a rewarding and enjoyable process. Not only does it allow you to customize the size and type of wick for your specific candle-making project, but it also gives you a deeper understanding of the components that go into crafting a candle from scratch.
Essential Tools for Wick Making
To make your own candle wick, you will need a few key tools:
- Scissors or wick trimmers
- Wick sustainer tabs
- Wick pegs or clothespins for drying
- A heat-resistant surface
Having the right tools at your disposal is crucial for creating a high-quality candle wick. Scissors or wick trimmers will help you cut the wick to the desired length, while wick sustainer tabs ensure that the wick stays in place within the candle. Wick pegs or clothespins are essential for drying the wick properly, allowing it to maintain its shape and integrity during the candle-making process. Additionally, working on a heat-resistant surface will help prevent any accidents or damage while handling hot wax.
Choosing the Right Wick Material
The choice of wick material depends on the type of candle you are making. Cotton wicks are suitable for most candles, while wooden wicks are ideal for soy-based and container candles. Beeswax candles may require different wicks due to their higher melting point.
When selecting the appropriate wick material for your candle, consider factors such as burn rate, flame size, and fragrance throw. Cotton wicks are known for their clean burn and minimal soot production, making them a popular choice for various candle types. Wooden wicks, on the other hand, create a cozy crackling sound when lit, adding an extra sensory element to your candle experience. Beeswax candles, with their natural and sweet aroma, require wicks that can withstand the higher temperatures at which beeswax melts, ensuring a steady and consistent burn.
Preparing for the Wick-Making Process
Before you start making your candle wick, always prioritize safety and set up a dedicated workspace. Taking appropriate precautions will ensure a smooth and accident-free experience.
Creating your own candle wick can be a rewarding and creative process, but it’s essential to be mindful of safety measures and workspace setup to make the experience enjoyable and safe.
Safety Measures to Consider
When working with hot wax and flammable materials, it is crucial to follow safety guidelines:
- Wear protective gloves and eyewear
- Keep a fire extinguisher nearby
- Work in a well-ventilated area
- Keep children and pets away from the workspace
Additionally, consider wearing long sleeves and tying back long hair to prevent any accidents or injuries during the wick-making process. Having a first aid kit on hand is also a proactive safety measure in case of minor mishaps. Read more about protective gloves on https://ehs.missouri.edu/ppe/gloves
Setting Up Your Wick-Making Space
Clear a clean, flat surface to work on and cover it with a heat-resistant mat or aluminum foil. This will protect your work surface from potential wax spills and make cleaning up easier after the process.
Organize your materials neatly within reach to avoid clutter and confusion during the wick-making process. Having a designated area for each tool and supply can streamline your workflow and enhance efficiency.
Step-by-Step Process of Making a Candle Wick
Now that you have everything prepared, let’s dive into the step-by-step process of making your candle wick.
Creating a candle wick is a crucial step in candle making, as it directly impacts the way your candle burns. A well-made wick ensures a steady flame and efficient burning of the wax, providing a delightful candlelight experience.
Preparing Your Wick Material
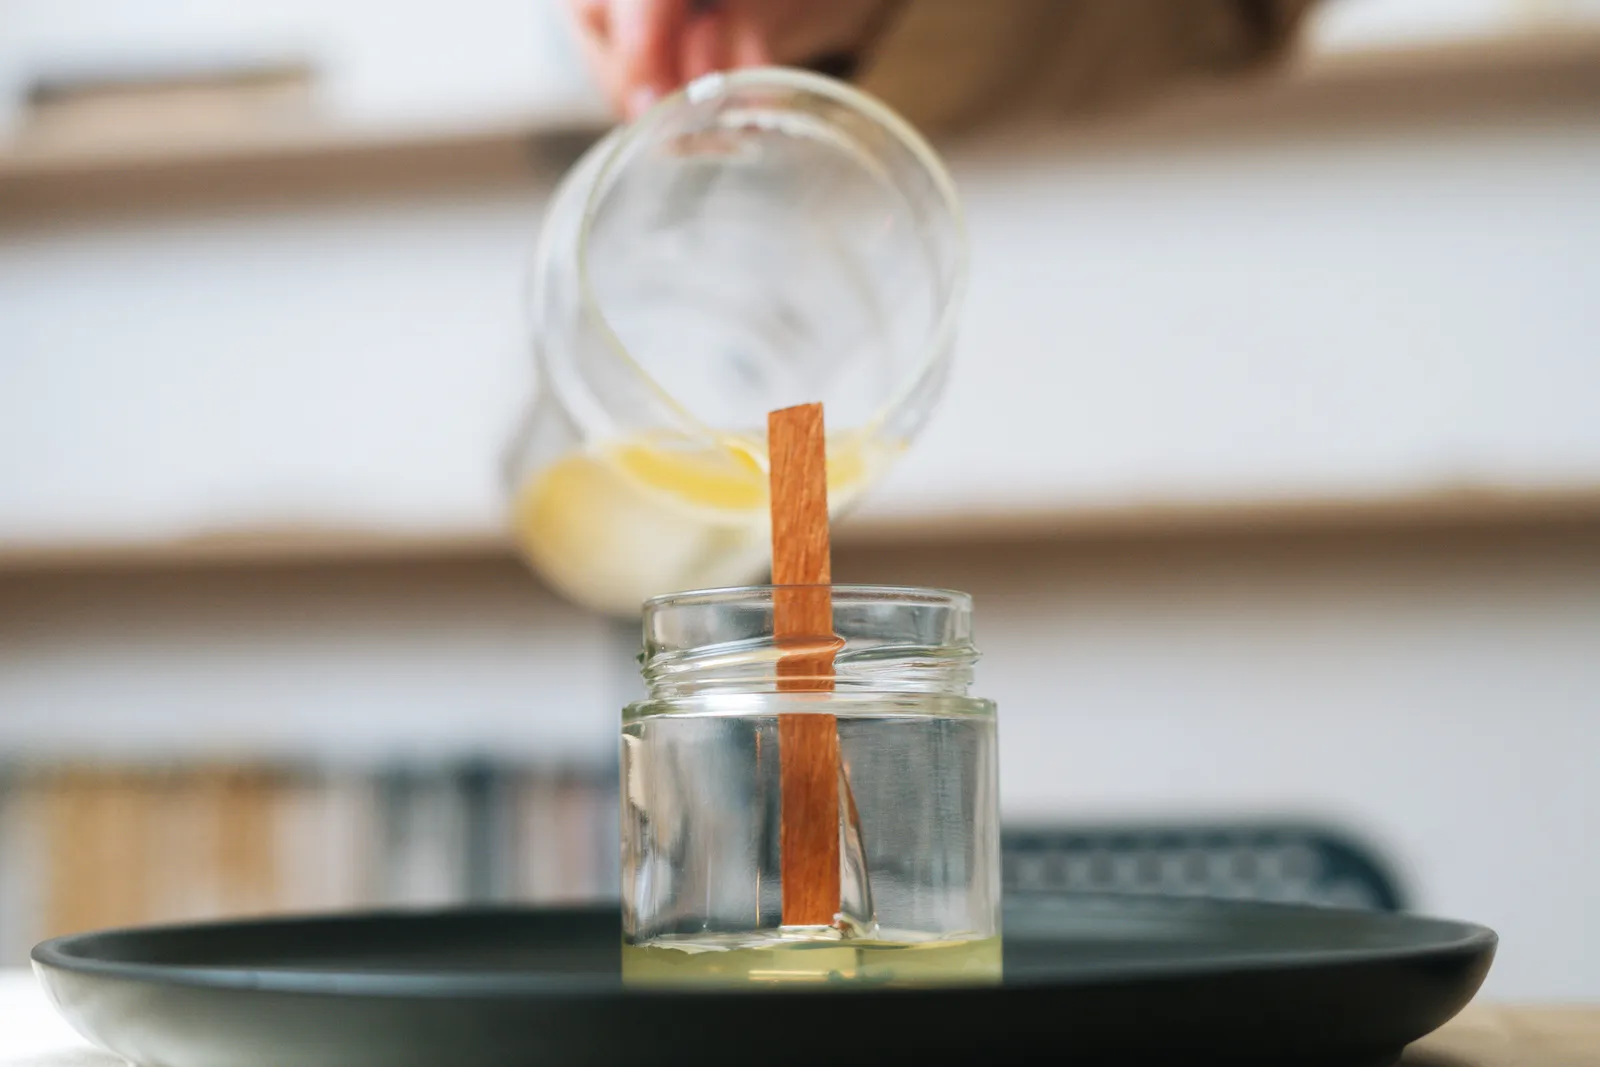
If you are using cotton wick material, cut it to the desired length. Ensure that it is long enough to reach the bottom of your candle container with a few extra inches to spare. For wooden wicks, no cutting is necessary as they come in a pre-cut length.
Choosing the right wick material is essential. Cotton wicks are a popular choice for container candles due to their efficient burn. On the other hand, wooden wicks offer a unique crackling sound and aesthetic appeal, perfect for creating a cozy ambiance.
Treating Your Wick
To enhance the performance of your wick, it is essential to treat it with a suitable substance. Dip your cotton wick in melted wax or a wick coating solution and let it soak for a few minutes. This process strengthens the wick and helps it burn more steadily.
Properly treating your wick also helps in preventing mushrooming, where carbon builds up at the tip of the wick, leading to excessive flickering and soot formation. By priming the wick, you ensure a cleaner and more consistent burn throughout the candle’s life.
Drying and Cutting Your Wick
Once treated, hang the wick vertically using wick pegs or clothespins and allow it to dry completely. When dry, cut the wick to the desired length, leaving a bit of excess to secure it to the wick sustainer tab. To learn more about sustainer click here.
Trimming the wick to the right length is crucial for controlling the size of the flame. A wick that is too long can cause the candle to burn too hot, leading to tunneling, while a wick that is too short may drown in the wax. Finding the perfect balance ensures an optimal burn and maximizes the lifespan of your candle.
Troubleshooting Common Wick-Making Issues
Despite careful preparation, issues with candle wicks can still occur. Here are solutions to some common problems:
Why Your Wick Isn’t Burning Properly
If the flame is flickering, too small, or extinguishes frequently, try trimming the wick to a shorter length. The wick may be too long, causing an imbalance between fuel (wax) and oxygen supply.
How to Fix a Wick That’s Too Short or Too Long
If you find that your wick is too short or too long after making it, simply make a new wick using the correct length. Properly measure the length required for your specific candle container and repeat the wick-making process.
It’s important to note that the type of wick material can also impact the burn of your candle. Cotton wicks are a popular choice for many candle makers due to their clean burn and minimal soot production. However, if you’re looking for a wick that works well with scented candles, consider using a wooden wick for a crackling ambiance.
Experimenting with different wick sizes and materials can lead to unique candle creations. For a larger candle, like a pillar candle, you may need a thicker wick to ensure an even burn. On the other hand, smaller container candles may require a thinner wick to prevent tunnelling and wasted wax.
Read about 3 wick candle on: The Benefits of Using a 3 Wick Candle in Your Home